NUVOTON 新唐 NuMaker-UNO-M4 開箱文

作者:順哥
email:palmbear@gmail.com

參考資料 1:NUVOTON 新唐 NuMaker-UNO-M4 產品頁,https://direct.nuvoton.com/tw/numaker-uno-m4?srsltid=AfmBOopFhCXT5ftx5FTkoTcIVZLXr0MX_9o07sI9xKODXf4wINY5kuBc
參考資料 2:Chat Everywhere,https://v2.chateverywhere.app/zh

一、簡介(引用參考資料 1)
新唐 NuMaker-UNO-M4 開發板是使用新唐 MCU 作為微控制器的一款 Arduino 相容硬體。它的功能可以透過 Arduino 相容的擴充板來擴展。使用者可以使用 Arduino 相容的 IDE 來開發他們的應用程式,並充分利用大量的公開範例。

NuMaker-UNO-M4 是一個特別的開發工具,用於新唐 Cortex®-M4 系列的使用者透過其可以開發並容易驗證該應用程式。其目的是提供一套開發及學習的平台,具有 ADC、PWM、I²C、SPI 等周邊功能,使用者可以設定不同功能的 NuMaker-UNO-M4 開發套件,也可根據使用者需求增加外設功能的開發套件,易於上手,提供開發所需的靈活性。

二、外觀
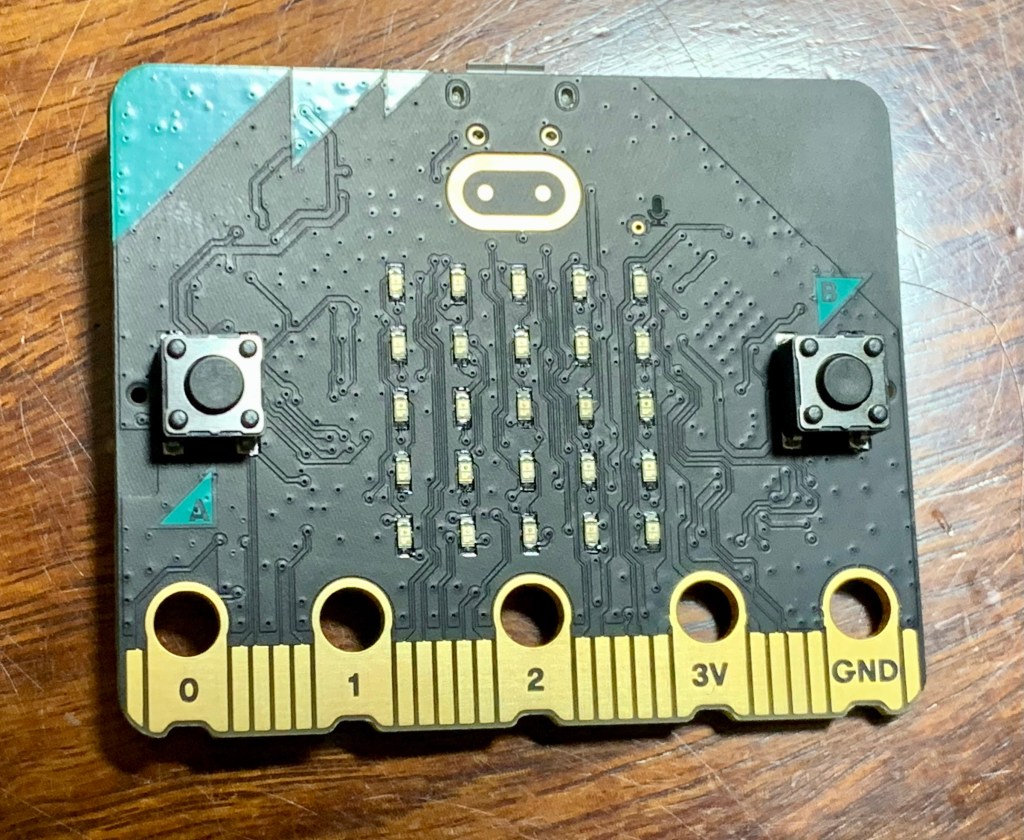
NUVOTON 新唐 NuMaker-UNO-M4 外觀
![IMG_3658](https://hackmd.io/_uploads/S11BnjYtel.jpg)
![IMG_3659](https://hackmd.io/_uploads/Hk1r3iFtxx.jpg)
![IMG_3660](https://hackmd.io/_uploads/HJyBniKKgl.jpg)

三、主要特點(引用參考資料 1)
特色:
* 學習/應用/調試:全系列開發工具
* 攜帶方便的開發調試工具包
* 豐富的微控制器周邊設備功能,如ADC、PWM、I²C、SPI、UART…
* 具有高可擴展性:連接電路板可以改變不同的應用模組
* 相容 Arduino UNO R4
* 支持對 USB 的虛擬串口
* 支援 Arduino 的 IDE
* 多元的供電方式
– USB VBUS
– 外部電源支援 5V,可以從其他電源提供給 DC 插座
* LEDs 狀態指示燈
– Power, I/O, UART (Tx, Rx) 和 SPI CLK 狀態…等燈號
* 提供 RESET 按鈕

NuMaker-UNO-M4開發板接頭名稱及定義如下:
![IMG_3661](https://hackmd.io/_uploads/r1JS2sFFxl.jpg)

![IMG_3662](https://hackmd.io/_uploads/S1kS3sKFge.png)

插上電後,有一個閃爍3顆LED的程式已預先燒入上去。

四、Arduino IDE 開發環境安裝

1. 至Arduino 官網下載 Arduino IDE 開發環境,執行所下載之安裝檔,並安裝 Arduino IDE。
2. 執行 Arduino IDE。選擇 File → Preferences
3. 並在 Additional Board Manager 的欄位中輸入下列網址: https://raw.githubusercontent.com/OpenNuvoton/NuMaker_UNO/master/package_nuvoton_index.json
![截圖 2025-08-24 15.59.33](https://hackmd.io/_uploads/SJA0jjKKel.png)

4. 利用左邊「開發板」按鈕,搜尋NuMaker UNO M4,並安裝「UnMaker M4」,目前最新版是「13.3.9」。

選擇 Tools → Board → Boards Manager ,
NuMaker M4 會出現在清單底部;點選 NuMaker M4 並按下 Install
![截圖 2025-08-24 16.00.05](https://hackmd.io/_uploads/HJRRoottex.png)
![截圖 2025-08-24 16.00.45](https://hackmd.io/_uploads/SJA0ioFKlg.png)
![截圖 2025-08-24 16.02.59](https://hackmd.io/_uploads/r1R0oitKxl.png)
5. 待軟體包下載安裝完畢,即可在 Tools → Board 選用 NuMaker-UNO-M4
![截圖 2025-08-24 16.03.35](https://hackmd.io/_uploads/HkRAiiKKex.png)
6. 選擇開發板NuMaker-UNO-M4,以及連接埠。
![截圖 2025-08-24 16.29.57](https://hackmd.io/_uploads/ByACsjtKgx.png)

或點選「工具」,再選擇開發板NuMaker-UNO-M4,以及連接埠
![截圖 2025-08-24 16.06.36](https://hackmd.io/_uploads/Bke0CojKYee.png)
![截圖 2025-08-24 16.07.27](https://hackmd.io/_uploads/HJCCsoKtel.png)
7. 開啟範例程式:Blink,並上傳
![截圖 2025-08-24 16.09.13](https://hackmd.io/_uploads/BJA0joKYxx.png)
8. 編譯完成上傳失敗,缺少「isptool」這個程式。
![截圖 2025-08-25 18.13.38](https://hackmd.io/_uploads/SyFDD2Ytll.png)
9. 「isptool」這個程式是一個Windows OS的bat檔,在macOS當然不能用。
![截圖 2025-08-24 16.22.36](https://hackmd.io/_uploads/BkARsiYKgl.png)
10. 經過一個下午,找ChatGPT幫忙,用Python做出了「Nuvoton ISP Tool」GUI程式,但是無法正常連接 NuMaker-UNO-M4。
![截圖 2025-08-24 18.42.41](https://hackmd.io/_uploads/S1CRjoKYeg.png)
11. 使用「UTM」Windows虛擬機,進行測試才順利上傳Blink程式。
![截圖 2025-08-25 17.00.10](https://hackmd.io/_uploads/SkH2jntKgg.png)
![截圖 2025-08-25 17.03.13](https://hackmd.io/_uploads/HJBho2KFxx.png)
12. Blink.py測試程式
點亮、熄滅內建LED,每0.2秒循環一次內建LED,Blink.py。
“`c++=
//Blink程式,閃爍內建「LED 3」每0.2秒閃爍一次
// the setup function runs once when you press reset or power the board
void setup() {
// initialize digital pin LED_BUILTIN as an output.
pinMode(LED_BUILTIN, OUTPUT);
}

// the loop function runs over and over again forever
void loop() {
digitalWrite(LED_BUILTIN, HIGH); // turn the LED on (HIGH is the voltage level)
delay(200); // wait for a second
digitalWrite(LED_BUILTIN, LOW); // turn the LED off by making the voltage LOW
delay(200); // wait for a second
}
“`
測試程式Blink.ino影片

五、結論
目前「NUVOTON 新唐 NuMaker-UNO-M4」在Arduino IDE開發環境,僅支援「Windows OS」,不支援「macOS」。

希望「新唐NUVOTON」早點支援 macOS。

如何在masOS安裝Google Gemini CLI

作者:順哥

email:palmbear@gmail.com

參考資料 1:Gemini CLI GitHub,https://github.com/google-gemini/gemini-cli

參考資料 2:【Gemini CLI 安裝/使用教學】Mac版|程式安裝+指令大補帖,https://www.youtube.com/watch?v=AO2tuyNFXkEGemini

參考資料 3:CLI 橫空出世 | 不只免費,軟體還開源 | 完整安裝 可呼叫Google Search,https://www.youtube.com/watch?v=ws1ee6aKB7Q

一、簡介

Gemini CLI 是一款基於 Gemini AI 技術的命令列工具,支持繁體中文輸入與輸出,方便用戶在終端環境中快速進行自然語言交互。它能處理繁體中文的文本生成、問題回答、文本摘要和翻譯等功能,操作簡潔直觀,適合開發者和專業用戶用於自動化腳本、資料處理及快速查詢。

二、安裝環境

1. Macbook pro M1
2. macOS 15.6.1
3. brew
4. node.js

三、參考Gemini CLI GitHub及各「參考資料」,實際的安裝程序如下:

  1. 步驟一:打開終端機,安裝 Gemini CLI1

使用 brew 直接安裝:`brew install gemini-cli`

2. 步驟二:執行 Gemini CLI

安裝完成後,輸入 `gemini` 直接執行 Gemini CLI ,會出現下圖:

3. 步驟三:登入 Gemini CLI

我使用第一種方法,就是使用Google 帳號登入,最簡單。

(使用上下鍵可以在選項中移動,按下 “Enter" 鍵,選擇)

登入後就可以直接使用了。

三、問題

執行Gemini CLI後,出現這段文字,指的是「你現在是在"home"目錄下執行Gemini CLI,推薦在『特定專案』目錄下執行Gemini CLI。」(如下圖)

登入Gemini CLI後,我直接問 Gemini:

「我收到『You are running Gemini CLI in your home directory. It is recommended to run in a project-specific directory.』這段訊息,執行Gemini CLI對我有什麼壞處?

他把問題的壞處說明後,直接提出最佳解決方法。(如下圖)

我接著請Gemini「請為我建立一個目錄「Gemini Test Project」,並且在這個目錄下重新啟動Gemini」。

但基於AI的本分,可以幫我建立目錄,但不能直接幫我執行這個操作。

執行 `/quit` 離開 Gemini,出現下圖。

因為macOS的目錄名稱中間不能有空白,所以重新建立「Gemini_test」目錄,在執行 Gemini CLI。

Pico 及 Micro:bit 的程式或韌體在 macOS 13.01 無法拖拉上傳?請升級到 macOS 13.1

作者:順哥
email:palmbear@gmail.com

先前使用 MacBook pro 將 Pico 及 Micro:bit 的程式或韌體拖拉上傳到裝置的功能,非常方便。

Micro:bit,請參考 Micro:bit官網 Transfer from a computer 直接拖拉hex檔到Micro:bit。

但是在 macOS 更新到 macOS 13.01 後,便無法用拖拉上傳了,後來問了Google 大神才知道這是 macOS 的問題!

請參考下面網址:

參考資料1:https://www.raspberrypi.com/news/the-ventura-problem/

參考資料2:https://blog.adafruit.com/2022/10/31/uploading-uf2-files-with-macos-13-0-ventura-apple-microbit_edu-raspberry_pi-circuitpython/

Raspberry Pi 及 Adafruit 這二個單位都鼓勵大家跟 Apple 公司回報問題,希望 Apple 能儘快修正!

未修改前,可以使用終端機命令列來上傳程式或韌體到裝置上,命令參考如下:

cp -X MICROBIT.hex /Volumes/MICROBIT/

Apple 公司這幾天已經發佈了macOS 13.1,經過測試已經解決這個無法拖拉上傳程式的問題了。

如果你使用的朋友,建議大家趕快升級到 macOS 13.1。

VIA Pixetto Vision Sensor視覺感測器 開箱及教學資料


作者:順哥
email:palmbear@gmail.com

資料來源:

  1. Cavedu 課程講義
  2. VIA Pixetto官方網站
  3. VIA Pixetto官方開發者網站

Table of Contents

[TOC]

前言

" VIA Pixetto Vision Sensor 視覺感測器 " 是一個存有預訓練機器學習模型,與機器學習加速器的超高畫質感測器,涵括物體、形狀、顏色、人臉及手寫辨識特點,並可上傳神經網路模型進行辨識。

硬體規格

型號Pixetto (VTS8787C)
處理器ARM Cortex-A7 900MHz
記憶體64MB DDR SDRAM
儲存空間128MB SPI 快閃記憶體
鏡頭感光元件GalaxyCore GC2053 CMOS 圖像感測器
鏡頭解析度1920×1080
鏡頭可視角130° field-of-view
板載輸入/輸出3 LEDs (電源-Green、無線網路-Blue、辨識狀態指示燈-Red)
重置按鍵
麥克風
Grove 連接器(UART)
Micro USB 2.0 端口
Micro SD 卡插槽
Wi-Fi 內置微型天線 (802.11b/g/n )
輸入電源
5V/300mA 4針 Grove 連接器
運作溫度0 ~ 45℃
尺寸38mm x 38mm (1.5” x 1.5”)

原廠最新版韌體

我使用最新版本軟體及韌體:

Pixetto 韌體修復工具Pixetto Firmware Recovery v1.6.2
Pixetto 設置工具Pixetto Utility v1.6.2
Pixetto 函式庫Pixetto Library for Arduino v1.6.4 v1.6.5
Pixetto Lite 函式庫Pixetto Lite Library for Arduino v1.6.4 v1.6.5
Pixetto Editor v1.6.0
Pixetto Link v1.2.5
Pixetto Lite圖形化積木設計指南 v0.1

原廠最新版軟體及韌體下載如下:
https://learn.pixetto.ai/pixetto.html#r15

軟體安裝教學

  1. 威盛 Pixetto 基礎安裝
    https://pixetto.ai/tw/2020/07/getting-started-with-pixetto-tw/
  2. 【AI人工智慧-神經運算】環境建置:安裝Anaconda、Tensorflow、Keras與openCV(Windows篇)
    https://blog.cavedu.com/2018/09/28/general_env_setup_anaconda_tensorflow_keras_opencv/
  3. VIA Python 環境設置
    https://pixetto.ai/tw/2020/08/python-environment-setup-tw/
  4. 教你如何連接威盛Pixetto 到Arduino開發板
    https://pixetto.ai/tw/2020/07/connecting-pixetto-to-arduino-uno-tw/
  5. 本日範例(AI_TEST.zip)
    https://drive.google.com/drive/folders/1lQDew5C2Ma4KzbXARk-uUEv-mj6yTCnx?usp=sharing

Python Jupyter Notebook應用

前置軟體:Pixetto Utility、Python Jupyter Notebook
通訊方式:Serial、Pixetto

  1. 用TensorFlow訓練CNN模型判別剪刀石頭布
    Jupyter Notebook(雲端)
    https://pixetto.ai/tw/2020/12/rock-paper-scissors-game-tw/
  2. 決鬥吧!TensorFlow剪刀石頭布進階Python應用:猜拳遊戲!
    https://pixetto.ai/tw/2020/12/rock-paper-scissors-game-tw/
  3. 辨識手寫英文單字
    https://pixetto.ai/tw/2020/08/handwritten-english-word-recognition-tw/
  4. 利用神經網路訓練威盛Pixetto辨識物件
    https://pixetto.ai/tw/2020/07/object-recognition-using-an-neural-network-tw/

Python Jupyter Notebook應用

前置軟體:Scratch(雲端) + Arduino
通訊方式:Serial、Pixetto

  1. 紅是紅、藍是藍!超好玩的「Scratch顏色分類機」
    https://pixetto.ai/tw/2020/11/color-sorter-device-tw/
  2. 一起玩 Scratch 遊戲吧!適合大朋友小朋友的「口罩配戴辨識遊戲」
    https://pixetto.ai/tw/2020/10/mask-wearing-recognition-game-tw/
  3. 活用Scratch和Arduino,實作威盛Pixetto「人臉偵測警示燈」
    https://pixetto.ai/tw/2020/10/face-detection-warning-light-tw/
  4. 教你如何運用威盛Pixetto來製作「人臉偵測警報器」
    https://pixetto.ai/tw/2020/09/face-detection-alarm-tw/
  5. 一元一次方程式流程說明
    https://pixetto.ai/tw/2020/08/linear-equation-game-tw/
  6. 教你創作水果著色遊戲
    https://pixetto.ai/tw/2020/08/learn-how-to-create-a-fruit-coloring-game-tw/
  7. 教你做出貓咪抓老鼠小遊戲
    https://pixetto.ai/tw/2020/07/cat-chasing-mouse-tw/
  8. 教你如何做出可愛的變色龍
    https://pixetto.ai/tw/2020/07/learn-how-to-create-a-color-changing-chameleon-tw/
  9. 教你學會如何運用顏色辨識功能來控制自動小車
    https://pixetto.ai/tw/2020/07/learn-how-to-program-a-color-controlled-driverless-car-tw/
  10. 教你輕鬆學會讓自動小車追蹤彩球
    https://pixetto.ai/tw/2020/07/color-following-driverless-car-step-by-step-guide-tw/
  11. 教你使用Blocks程式積木,設計有趣的鸚鵡追球遊戲
    https://pixetto.ai/tw/2020/06/parrot-chasing-ball-learn-how-to-code-with-blocks-tw/
  12. 前置軟體:Pixetto Utility + Arduino
    教你運用威盛Pixetto的AprilTag辨識功能來控制自動小車
    https://pixetto.ai/tw/2020/09/apriltag-controlled-car-tw/

實作:使用 Google Teachable Machine 訓練模型檔,威盛Pixetto辨識物件

  1. 使用 Google Teachable Machine 訓練模型檔
  2. 下載模型
  3. 儲存模型
  4. 模型內檔案
  5. 開啟Pixetto Utility,選取"神經網路辨識"
  6. 選取模型
  7. 上傳模型
  8. 立即辨識
  9. 辨識影片Youtube辨識影片

結語

VIA 這個 pixetto 視覺感測器真是好用,可以立即把 Google Teachable Machines 訓練完成 Tensorflow Lite floating point 的模型直接上傳到視覺感測器內,並且直接辨識,省去非常多的時間。

130度廣角、高解析度鏡頭,簡單、便利的 UI 介面,提供預訓練模型,也可以結合 Google Teachable Machines 訓練的模型, NO Code 的完成神經網路模型訓練、辨識,實在是教學上的利器,也是進階者後續應用的好工具。

Appendix and FAQ

  1. VIA Pixetto英文使用手冊
  2. VIA Pixetto簡易操作手冊
  3. VIA Pixetto簡易規格書
tags: AI NN Pixetto 神經網路 視覺辨識 視覺感測器

在 macOS Monterey 12.4 環境,使用 Micropython 在 ESP32 SSD1306 顯示 圖形


作者:順哥
email:palmbear@gmail.com

資料來源:
1.image2cpp
2.| ESP32 教學 | MicroPython | I2C OLED Image 顯示圖像 | 209 |
3.SSD1306.py


Table of Contents

[TOC]


前言

測試在 macOS Monterey 12.4 環境,使用 Micropython 在 ESP32 用 SSD1306 OLED 顯示 image 圖形。


Step 1:使用的圖形

在 google網站搜尋一張看起來順眼,個人使用無版權的黑色的熊熊圖(png檔),就用這張圖來做測試,這張圖的原始尺寸為 “981 x 562″。
網頁畫面:


Step 2:將圖形轉換成 byte arrays

因為在macOS上找不到適當軟體可以使用,在 google網站上找到這個
image2ccp

這個網站可以將 image 轉換為 byte arrays(或將您的 byte arrays 轉換回 image),然後給 OLED 顯示出來。
網頁畫面:

  1. 選擇圖形 Select image:
    點選「選擇檔案」,上傳圖形檔。
    網頁畫面:
  2. 圖形設定 image Settings:
    在「畫布尺寸」 Canvas size(s) 欄位中,填入 OLED 的像數規格,我使用 “128 x 64″ ,所以在這裡我們填入 “128″ 及 “64″ ,圖形的原始尺寸為 “981 x 562″,這個網站可以將圖形直接轉成我們需要的大小。
    接下來選擇 “stretch to fill canvas" 「拉伸填充畫布」。
    網頁畫面:
  3. 圖形預覽 Preview:
    隨即就會在「圖形預覽」Preview,看到圖形。
  4. 輸出 Output:
    在「代碼輸出格式」"Code output format" 欄位中,填入 “plain bytes" ,
    接下來在「繪製模式」"Draw mode" 欄位中,填入 “Vertical – 1 bit per pixel" ,
    最後按下 “Generate code" 擷取碼,並將16進位的碼 Copy 下來。
    網頁畫面:

Step 3:測試程式碼

我使用 資料來源2 的程式碼,SSD1306 module 使用 資料來源3 ,並依照自己的ESP32接腳,改用SoftI2C,我的程式碼如下:

from machine import Pin, SoftI2C #從machine 匯入 Pin, SoftI2C
import ssd1306 #匯入 ssd1306模組
import framebuf #匯入 fram3buf模組

i2c = SoftI2C(scl=Pin(22), sda=Pin(21), freq=400000) # 建立 i2c 物件

oled=ssd1306.SSD1306_I2C(128, 64, i2c) #建立 oled096 物件,第 1 個參數與第 2 個參數設定為 OLED 模組的像素,第 3 個參數為 I2C 的物件名稱

# img64 是一個 bytearrays 的列表(List) 
img64 = [
0xff, 0xff, 0xff, 0xff, 0xff, 0xff, 0xff, 0xff, 0xff, 0xff, 0xff, 0xff, 0xff, 0xff, 0x7f, 0x7f, 
0x3f, 0x1f, 0x1f, 0x0f, 0x07, 0x07, 0x07, 0x03, 0x03, 0x01, 0x01, 0x01, 0x01, 0x01, 0x00, 0x00, 
0x00, 0x00, 0x00, 0x00, 0x00, 0x00, 0x00, 0x00, 0x00, 0x00, 0x00, 0x00, 0x01, 0x01, 0x01, 0x01, 
0x01, 0x01, 0x01, 0x01, 0x03, 0x03, 0x03, 0x03, 0x03, 0x03, 0x03, 0x03, 0x03, 0x03, 0x07, 0x07, 
0x07, 0x07, 0x07, 0x07, 0x07, 0x07, 0x07, 0x07, 0x07, 0x03, 0x03, 0x03, 0x01, 0x01, 0x01, 0x01, 
0x01, 0x01, 0x01, 0x01, 0x03, 0x03, 0x03, 0x03, 0x07, 0x07, 0x07, 0x07, 0x0f, 0x0f, 0x0f, 0x1f, 
0x1f, 0x1f, 0x1f, 0x1f, 0x1f, 0x1f, 0x1f, 0x1f, 0x1f, 0x3f, 0x3f, 0x3f, 0x3f, 0x3f, 0x7f, 0x7f, 
0x7f, 0x3f, 0x3f, 0x7f, 0xff, 0xff, 0xff, 0xff, 0xff, 0xff, 0xff, 0xff, 0xff, 0xff, 0xff, 0xff, 
0xff, 0xff, 0xff, 0xff, 0xff, 0xff, 0xff, 0xff, 0x3f, 0x1f, 0x07, 0x03, 0x01, 0x00, 0x00, 0x00, 
0x00, 0x00, 0x00, 0x00, 0x00, 0x00, 0x00, 0x00, 0x00, 0x00, 0x00, 0x00, 0x00, 0x00, 0x00, 0x00, 
0x00, 0x00, 0x00, 0x00, 0x00, 0x01, 0x01, 0x03, 0x03, 0x07, 0x2f, 0x7f, 0xff, 0xff, 0xff, 0xff, 
0xff, 0xff, 0xff, 0xff, 0xff, 0x3f, 0x07, 0x00, 0x00, 0x00, 0x00, 0x00, 0x00, 0x00, 0x00, 0x00, 
0x00, 0x00, 0x00, 0x00, 0x00, 0x00, 0x00, 0x00, 0x00, 0x00, 0x00, 0x00, 0x00, 0x00, 0x00, 0x00, 
0x00, 0x00, 0x00, 0x00, 0x00, 0x00, 0x00, 0x00, 0x00, 0x00, 0x00, 0x00, 0x00, 0x81, 0xc3, 0xf7, 
0xff, 0xff, 0xff, 0xff, 0xc1, 0x00, 0x00, 0x00, 0x00, 0x00, 0x00, 0x00, 0x00, 0x00, 0x00, 0x00, 
0x00, 0x00, 0x00, 0x00, 0x00, 0x00, 0x00, 0x00, 0x00, 0x00, 0x00, 0x00, 0x00, 0x00, 0x00, 0x00, 
0x00, 0x00, 0x00, 0x00, 0x08, 0x38, 0xf8, 0xf8, 0xfc, 0xfc, 0xfc, 0xfc, 0xfc, 0xfc, 0xfe, 0xfe, 
0xfe, 0xfe, 0xfe, 0xff, 0xff, 0xff, 0xff, 0xff, 0xfe, 0xfe, 0xff, 0xff, 0xff, 0xff, 0xff, 0xff, 
0xff, 0xff, 0xff, 0xff, 0xff, 0xfe, 0xfc, 0xfc, 0x3c, 0x00, 0x00, 0x00, 0x00, 0x00, 0x00, 0x00, 
0x00, 0x00, 0x00, 0x00, 0x00, 0x00, 0x00, 0x00, 0x00, 0x00, 0x00, 0x00, 0x00, 0x00, 0x00, 0x00, 
0x00, 0x00, 0x00, 0x00, 0x80, 0x80, 0x80, 0x80, 0x80, 0x80, 0x80, 0x80, 0x80, 0x80, 0x80, 0x80, 
0x80, 0x80, 0x80, 0xc0, 0xc0, 0x80, 0xc0, 0xc0, 0xc0, 0xe0, 0xe0, 0xe0, 0x20, 0x00, 0x00, 0x00, 
0x00, 0x00, 0x00, 0x00, 0x00, 0x00, 0x00, 0x00, 0x00, 0x00, 0x00, 0x00, 0x00, 0x00, 0x00, 0x00, 
0x00, 0x80, 0xc0, 0xf0, 0x80, 0x00, 0x00, 0x00, 0x00, 0x00, 0x00, 0x00, 0x00, 0x00, 0x00, 0x00, 
0x00, 0x00, 0x00, 0x00, 0x00, 0x00, 0x01, 0x03, 0x0f, 0x3f, 0x7f, 0xff, 0xff, 0xff, 0xff, 0xff, 
0xff, 0xff, 0xff, 0xff, 0xff, 0xff, 0xff, 0xff, 0xff, 0xff, 0xff, 0xff, 0xff, 0xff, 0xff, 0xff, 
0xff, 0xff, 0x3f, 0x1f, 0x0f, 0x07, 0x03, 0x00, 0x00, 0x00, 0x00, 0x00, 0x00, 0x00, 0x00, 0x00, 
0x00, 0x00, 0x00, 0x00, 0x00, 0x00, 0x00, 0x00, 0x00, 0x00, 0x00, 0x00, 0x00, 0x00, 0x00, 0x00, 
0x00, 0x00, 0xe0, 0xfe, 0xff, 0xff, 0xff, 0xff, 0xff, 0xff, 0xff, 0xff, 0xff, 0xff, 0xff, 0xff, 
0xff, 0xff, 0xff, 0xff, 0xff, 0xff, 0xff, 0xff, 0xff, 0xff, 0xff, 0x1f, 0x02, 0x00, 0x00, 0x00, 
0x00, 0x00, 0x00, 0x00, 0x00, 0x00, 0x00, 0x00, 0x00, 0x00, 0x00, 0x00, 0x00, 0x80, 0xf0, 0xfc, 
0xfc, 0xff, 0xff, 0xff, 0xff, 0xff, 0xfc, 0xf8, 0xf8, 0xf0, 0xe0, 0xc0, 0x80, 0x00, 0x00, 0x00, 
0x00, 0x00, 0x00, 0x00, 0x00, 0x00, 0x00, 0x00, 0x00, 0x00, 0x00, 0x01, 0x03, 0x07, 0x1f, 0x3f, 
0x7f, 0x3f, 0x7f, 0x7f, 0x7f, 0xff, 0xff, 0xff, 0xff, 0xff, 0xff, 0xff, 0xff, 0xff, 0xff, 0xff, 
0xc1, 0x80, 0x00, 0x00, 0x00, 0x00, 0x00, 0x00, 0x00, 0x00, 0x00, 0x00, 0x00, 0x00, 0x80, 0xc0, 
0xc0, 0xe0, 0xf0, 0xf8, 0x00, 0x00, 0x00, 0x00, 0x00, 0x00, 0x00, 0x00, 0x00, 0x00, 0x00, 0x00, 
0x00, 0x00, 0xff, 0xff, 0xff, 0xff, 0xff, 0xff, 0xff, 0xff, 0xff, 0xff, 0xff, 0xff, 0xff, 0xff, 
0xff, 0xff, 0xff, 0xff, 0xff, 0xff, 0xff, 0xff, 0xff, 0xff, 0xff, 0x01, 0x00, 0x00, 0x00, 0x00, 
0x00, 0x00, 0x00, 0x00, 0x00, 0x00, 0x00, 0x00, 0x00, 0x00, 0xc0, 0xfc, 0xfe, 0xff, 0xff, 0xff, 
0xff, 0xff, 0xff, 0xff, 0xff, 0xff, 0xff, 0xff, 0xff, 0xff, 0xff, 0xff, 0xff, 0xff, 0xff, 0xff, 
0xfe, 0xf8, 0xf8, 0xf8, 0xf8, 0xf0, 0xf8, 0xf8, 0xf0, 0xf0, 0xf0, 0xf0, 0xf0, 0xf0, 0xf0, 0xf0, 
0xf0, 0xf0, 0xf0, 0xf0, 0xf8, 0xfc, 0xfd, 0xff, 0xff, 0xff, 0xff, 0xff, 0xff, 0xff, 0xff, 0xff, 
0xff, 0xff, 0xfc, 0x80, 0x00, 0x00, 0x00, 0x00, 0x00, 0x00, 0x00, 0x00, 0x00, 0x00, 0x01, 0x03, 
0x87, 0x9f, 0xff, 0xff, 0xfc, 0xf8, 0xf8, 0xf0, 0xf0, 0xf0, 0xf0, 0xf0, 0xf0, 0xf0, 0xf0, 0xf0, 
0xf0, 0xf0, 0xf0, 0xf8, 0xf9, 0xff, 0xff, 0xff, 0xff, 0xff, 0xff, 0xff, 0xff, 0xff, 0xff, 0xff, 
0xff, 0xff, 0xff, 0xff, 0xff, 0xff, 0xff, 0xff, 0xff, 0xff, 0xfd, 0xf0, 0xf0, 0xe0, 0xe0, 0xe0, 
0xe0, 0xe0, 0xe0, 0xe0, 0xe0, 0xe0, 0xe0, 0xc0, 0xc0, 0xc0, 0xc0, 0xc1, 0xc1, 0xc1, 0xc3, 0xc3, 
0xe7, 0xdf, 0xff, 0xff, 0xff, 0xff, 0xff, 0xff, 0xff, 0xff, 0xff, 0xff, 0xff, 0xff, 0xff, 0xff, 
0xff, 0xff, 0xff, 0xff, 0xff, 0xff, 0xff, 0xff, 0xff, 0xff, 0xff, 0xff, 0xff, 0xff, 0xff, 0xff, 
0xff, 0xff, 0xff, 0xff, 0xff, 0xff, 0xff, 0xff, 0xff, 0xff, 0xff, 0xff, 0xff, 0xff, 0xff, 0xff
]

img064b = bytearray(img64)  # 將 img64 轉成 bytearray 型態,並取名 img64b
imgbuf=framebuf.FrameBuffer(img064b,128,64,framebuf.MONO_VLSB) #framebuf 第 1 個參數為影像資料的 bytearray名稱,第 2、3 個參數是影像的寬度與高度,第 4 個參數是像素形式與排列,MONO_VLSB 是指 單色+垂直+LSB
oled.blit(imgbuf, 0, 0) #blit方法,是將imgbuf 物件,由指定的 X,Y 位置,依序開始填入 OLED 記憶體
oled.invert(1) #以反白螢幕方式顯示圖形畫面
oled.show() #顯示螢幕畫面

程式說明

  1. 因為 framebuf 使用的資料型態是 bytearray,所以將 img64 轉成 bytearray 型態,並取名 img64b。
  2. 我們在轉檔時時是採用單色與垂直方向排列(Vertical)的方式存檔,所以預設轉出陣列就是 1btye 會有 8 像素,資料排列也就照著直線方式一條一條轉換,img64 原始資料共有 1024 個 bytes,換算成像素也就是1024×8=8192個像素,與我們OLED 的像素128*64=8192 Pixel 是相符的。
  3. mgbuf 為新建立的 framebuf 物件,framebuf 第 1 個參數為影像資料的 byte 序列,第 2、3 個參數分別為影像的寬度與高度,第 4 個參數就是像素形式與排列,MONO_VLSB 是指 單色+垂直+LSB(如果是其他形式可以填入framebuf.MONO_HLSB、framebuf.RGB565、framebuf.GS4_HMSB等。
  4. blit 這個方法也是源自 framebuf,將建立好的 imgbuf 物件,由指定的 X,Y 位置,依序開始填入 OLED 記憶體內。
    Micropython framebuf 模組的官方說明

成果

完成畫面:

我使用的硬體:

測試影片


tags: Micropython ESP32 Macbook pro 2021 macOS 12.4 Monterey

MacBook Pro Monterey,使用 Arduino IDE 燒錄 ESP8266 會出現燒錄錯誤 “pyserial or esptool directories not found next to this upload.py tool.”

資料來源:https://www.tweaking4all.com/forum/arduino/macos-aruino-ide-how-to-fix-pyserial-or-esptool-directories-not-found-next-to-this-upload-py-tool-error-esp8266/

錯誤訊息如下:

pyserial or esptool directories not found next to this upload.py tool.
An error occurred while uploading the sketch

macOS版本:Monterey 12.3.1

ESP8266 Core version:2.6.3

aArduino IDE version:1.8.19

解決方法:

  1. 打開這個檔案
    file~/Library/Arduino15/packages/esp8266/hardware/esp8266/2.6.3/tools/pyserial/serial/tools/list_ports_osx.py
  2. 註釋掉這兩行
iokit = ctypes.cdll.LoadLibrary('/System/Library/Frameworks/IOKit.framework/IOKit')    
cf = ctypes.cdll.LoadLibrary('/System/Library/Frameworks/CoreFoundation.framework/CoreFoundation')

加入這兩行:

iokit = ctypes.cdll.LoadLibrary('/System/Library/Frameworks/IOKit.framework/IOKit')
cf = ctypes.cdll.LoadLibrary('/System/Library/Frameworks/CoreFoundation.framework/CoreFoundation')

修改完成後,程式碼應該像下面這樣子才對:

from serial.tools import list_ports_common

#iokit = ctypes.cdll.LoadLibrary(ctypes.util.find_library('IOKit'))
#cf = ctypes.cdll.LoadLibrary(ctypes.util.find_library('CoreFoundation'))
iokit = ctypes.cdll.LoadLibrary('/System/Library/Frameworks/IOKit.framework/IOKit')
cf = ctypes.cdll.LoadLibrary('/System/Library/Frameworks/CoreFoundation.framework/CoreFoundation')

kIOMasterPortDefault = ctypes.c_void_p.in_dll(iokit, "kIOMasterPortDefault")
kCFAllocatorDefault = ctypes.c_void_p.in_dll(cf, "kCFAllocatorDefault")
這樣就可以正常燒錄了!
Done!

Apple 的 iCloud 實在太棒了!

原先想說會搬移舊資料會很傷腦筋,結果一點都不費力,只要登入iClloud就可以了,完全都不需要額外做什麼。

就是要花時間而已!

Macbook Pro星期六晚上帶回家,到今天晚上,過了2天,我的新Macbook Pro經由iColud就已經同步完成了。

但是,不是所有資料都下載到新Macbook Pro,只是有用到的會自動下載下來,其他就等你什麼時候會用到,需要用到時,再下載下來就可以了,不用擔心空間不夠用。

整理舊資料,只要刪除,就會同步刪除iCloud的檔案。

但是,如果要保存資料,要另外儲存在其他外接硬碟或隨身碟,再刪除喔!

真的太好用了!

有使用Apple的產品建議一定要購買iCloud,真的超級方便。


tags: Macbook pro 2021 macOS 12.3.1 Monterey

2021 Macbook Pro 14吋 安裝 Arduino IDE 1.18.9 在 ESP32 發生 「exec: “python" : executable file not found in $PATH」錯誤

資料來源:
1. https://forum.arduino.cc/t/esp32-problem-with-compilation-on-macos-12-3-monterey/969771
2. https://forum.arduino.cc/t/mac-os-update-killed-esp32-sketch/969580/8

作者:順哥
email:palmbear@gmail.com

Table of Contents

[TOC]

前言

最近新購買2021 Macbook Pro 14吋 使用 Arduino IDE 1.18.9 在ESP32開發板上傳程式碼時,發生 「exec: “python": executable file not found in $PATH’」錯誤。上網查了發現解決方法,留下紀錄,以免後續再碰到時,不知如何解決。

問題

ESP32: problem with compilation on MacOS 12.3 Monterey

問題頁面

網頁畫面:

解決方法
網頁畫面:


我的解決方法

我按照網頁上的解決方法,更改
/Users/palmbearhung/Library/Arduino15/packages/esp32/hardware/esp32/1.0.6/platform.txt 文件內容:

# From
tools.gen_esp32part.cmd=python "{runtime.platform.path}/tools/gen_esp32part.py"

# To
tools.gen_esp32part.cmd=/usr/local/bin/python "{runtime.platform.path}/tools/gen_esp32part.py"

但是還時不能上傳!!!

Arduino IDE跟我說「no such file or directory」

將 python 更改為 python3 也不行!!!

這倒底是怎麼一回事呢?

後來把整個文章看完,才知道也有人跟我一樣。

但是有解決方法,就是:

找出 python3放在電腦的哪個位置?

使用 which python3 指令,找出 python3 的所在位置。

原來我的 python3 位置跟他們的不一樣!

更改完成後,儲存檔案。

再次上傳檔案,成功!!!


tags: Arduino ESP32 Macbook pro 2021 macOS 12.3.1 Monterey

在Arduino 使用ESP32與網路同步時間,獲取日期及時間

作者:順哥
email:palmbear@gmail.com

資料來源:
https://randomnerdtutorials.com/esp32-date-time-ntp-client-server-arduino/

Table of Contents

[TOC]

前言

如何使用 ESP32 和 Arduino IDE 從 NTP Server 同步日期和時間?

獲取日期和時間在Aiot應用中很有用。要從 NTP Server獲取時間,ESP32需要連接 Internet,而且不需要額外的硬體(如 RTC 時鐘)。


NTP(Network Time Protocol, 網路時間協議)

NTP想要將所有參與電腦的協調世界時(UTC)時間同步到ms的誤差內。NTP通常可以在internet保持幾十毫秒的誤差,並且在理想的區域網路環境中可以實現超過1毫秒的精度。

MCU與NTP Server同步示意圖:
資料來源:randomnerdtutorials.com


硬體

  1. AI Thinker ESP32-S(NODMCU-32 V1.2)
  2. ESP32擴展板
  3. USB充電傳輸線

軟體

  1. Arduino IDE 2.0.0 RC5 for MacOS:
  2. 需要的Library:

<WiFi.h>
<time.h>


程式碼

  1. 使用 ESP32 加上 ESP32擴展板,程式碼如下:
/*
  Rui Santos
  Complete project details at https://RandomNerdTutorials.com/esp32-date-time-ntp-client-server-arduino/

  Permission is hereby granted, free of charge, to any person obtaining a copy
  of this software and associated documentation files.

  The above copyright notice and this permission notice shall be included in all
  copies or substantial portions of the Software.
*/

#include <WiFi.h>
#include <time.h>

const char* ssid     = "Your wifi ssid";
const char* password = "your password";

const char* ntpServer = "time.google.com";
const long  gmtOffset_sec = 28800; //台灣時區+8hr,28800=8*60*60
const int   daylightOffset_sec = 0;  //台灣無日光節約時間

void setup(){
  Serial.begin(115200);

  // Connect to Wi-Fi
  Serial.print("Connecting to ");
  Serial.println(ssid);
  WiFi.begin(ssid, password);
  while (WiFi.status() != WL_CONNECTED) {
    delay(500);
    Serial.print(".");
  }
  Serial.println("");
  Serial.println("WiFi connected.");

  // Init and get the time
  configTime(gmtOffset_sec, daylightOffset_sec, ntpServer);
  printLocalTime();

  //disconnect WiFi as it's no longer needed
  WiFi.disconnect(true);
  WiFi.mode(WIFI_OFF);
}

void loop(){
  delay(5000);
  printLocalTime();
}

void printLocalTime(){
  struct tm timeinfo;
  if(!getLocalTime(&timeinfo)){
    Serial.println("Failed to obtain time");
    return;
  }
  Serial.println(&timeinfo, "%A, %Y %m %d %H:%M:%S"); //%A-Sunday,%Y-2022,%m-3,%d-27,%H:%M:%S-21:10:02
  Serial.println(&timeinfo, "%A, %B %d %Y %H:%M:%S"); //%A-Sunday,%B-March,%d-27,%Y-2022,%H:%M:%S-21:10:02
  Serial.print("Day of week: "); //顯示英文 星期
  Serial.println(&timeinfo, "%A"); //Day of week: Sunday
  Serial.print("Month: "); //顯示英文 月份
  Serial.println(&timeinfo, "%B"); //Month: March
  Serial.print("Day of Month: "); //顯示英文 日
  Serial.println(&timeinfo, "%d"); //Day of Month: 27
  Serial.print("Year: "); //顯示英文 西元年
  Serial.println(&timeinfo, "%Y"); //Year: 2022
  Serial.print("Hour: "); //顯示英文 時 24小時制
  Serial.println(&timeinfo, "%H"); //Hour: 21
  Serial.print("Hour (12 hour format): "); //顯示英文 時 12小時制
  Serial.println(&timeinfo, "%I"); //Hour (12 hour format): 9
  Serial.print("Minute: "); //顯示英文 分
  Serial.println(&timeinfo, "%M"); //Minute: 01
  Serial.print("Second: "); //顯示英文 秒
  Serial.println(&timeinfo, "%S"); //Second: 24

  Serial.println("Time variables"); //時間變數Time variables
  char timeHour[3]; //宣告時間小時變數:timeHour
  strftime(timeHour,3, "%H", &timeinfo);
  Serial.println(timeHour); //顯示時數:22
  char timeWeekDay[10]; //宣告時間星期變數:timeWeekDay
  strftime(timeWeekDay,10, "%A", &timeinfo);
  Serial.println(timeWeekDay); //顯示星期:Sunday
  Serial.println("*****************************************************");

}

tags: NTP Arduino ESP32 ESP8266 Wio terminal

Arduino IDE 2.0 RC3 安裝紀實


title: ‘Arduino IDE 2.0 RC3 安裝紀實’

作者:順哥
email:palmbear@gmail.com

前言

Arduino IDE 已經發展很久了,但是編譯的速度一直很慢,因應這個問題以及 Tiny ML 的應用,終於開發出新版本,目前還在 RC3版本,提供大家試用,這邊可以下載嘗鮮Arduino IDE 2.0 RC3

下載網頁畫面:


安裝

可以按照自己的系統下載對應的檔案來安裝,我下載 Windows 版本來安裝。

下載後執行檔案就會看到:

安裝畫面-1:

安裝畫面-2:

依照指示完成安裝即可,Arduino IDE 2.0 RC3 安裝完成後,開啟它。


環境設定

  1. 第一次開啟Arduino IDE 2.0 RC3會出現這個新畫面,原先是淺色系,我把它改成暗色系:
  2. 新的使用者介面長這樣,工具列的左側最靠中間有一個 搜尋及選擇開發板 的小視窗,而左側的5個圖示分別是:
    (1)Sketchbook 草稿碼資料夾
    (2)Boards Manager 開發版管理員
    (3)Library Manager 函式庫管理員
    (4)Dubug 偵錯
    (5)Search 搜尋
  3. 點選 File > Preferences :
  4. 接下來就會看到Preferences的相關設定,把常用的都打勾,並點選右下角的符號以增加其他開發板如下圖:
  5. 點選右下角符號後,請copy下面網址貼在框框內,一個網址一行,以增加ESP8266、ESP32 以及 Wio terminal這三塊開發板:
    http://arduino.esp8266.com/stable/package_esp8266com_index.json
    https://dl.espressif.com/dl/package_esp32_index.json
    https://files.seeedstudio.com/arduino/package_seeeduino_boards_index.json
  6. 接下來點選左邊上面算下來第2個圖示-Boards Manager,並搜尋 ESP8266 ,安裝2.6.3版比較沒有問題。如下圖:
  7. 隨後搜尋 ESP32 ,安裝1.0.4版比較沒有問題。如下圖:
  8. 最後搜尋 Seeed wio terminal ,安裝1.8.2版
  9. 關閉 Arduino IDE 2.0 RC3 ,重新開啟,這樣就完成環境設定了。

測試

  1. 使用 ESP32 加上 ESP32 擴展版 來寫一個閃爍內建 LED 的程式來測試一下,程式碼如下:
//閃爍內建LED
void setup() {
  pinMode(2, OUTPUT);  //宣告pin2(內建LED)作為輸出用途
}
void loop() {
  digitalWrite(2, HIGH);  //宣告pin2(內建LED)輸出高電位(3.3V)
  delay(1000);            //延遲1秒
  digitalWrite(2, LOW);   //宣告pin2(內建LED)輸出低電位(0V)
  delay(1000);            //延遲1秒
}
  1. Arduino 2.0 在編輯時,再輸入程式碼時會出現輸入指令格式提示,這應該是Arduino 2.0 除了速度變快之外,最大的改變了!
  2. 程式碼編輯完成,並上傳到ESP32上的完成畫面:
  3. ESP32 + 擴展板相片
  4. ESP32閃爍LED影片

待續!!!

tags: Arduino ESP32 ESP8266 Wio terminal